Tuesday, July 27, 2010

Want to create your own die cuts up to 9" long? Oh my!!!!

As I mentioned in my previous post, Spellbinders(TM) today introduced the Grand Calibur(TM), the big daddy of die cut machines!  There's nothing like it anywhere!


It will cut and emboss up to 8.25" wide - that's right, you can run an 8.5" x 11" sheet of cardstock through without cutting it!  So load up a bunch of our classic die templates on one big sheet....or use the NEW Grand die templates!

Here are the dimensions for the new templates:

Grand Labels One
From 4 1/4” to 6 3/4”

Grand Labels Four
From 5 1/4” to 9 1/4”
Grand Ovals
From 4 1/4” to 7 1/2”

Grand Scalloped Ovals
From 4 3/4” to 8 1/4”

Grand Squares
From 4” to 7”

Grand Scalloped Squares
From 4 1/2” to 7”

Grand Circles
From 4 1/4” to 7 1/4”

Grand Scalloped Circles
From 4 3/4” to 7 1/4”

They're all available for purchase on the Spellbinders website!  Click on the image and you'll see the exact dimension of all the die templates in the collection, just below the description.

Let me know what you think!

BIG Spellbinders(TM) news from CHA!!!


You're gonna love this news!
Spellbinders™ is premiering our newest edition to the lineup - the raspberry beauty, Grand Calibur!  It cuts....it embosses....paper up to 8.5" x 11"! 

And there's more!  New BIG GRAND die templates up to 8.25" wide!  wooHOOO!!  CHA attendees can check it out at the Spellbinders' booth #1423!

Here it is, girlfriends!!!


Use the new Grand dies, or fill up your page with your classic die templates and cut a bunch with just one pass through the machine!  See all the new die templates on the Spellbinders blog!

I'll be posting the dimensions of the new die templates a bit later this evening.

WooHOOO!!!


Thursday, July 22, 2010

Need Adhesive? Uh......who doesn't????

I'd like to share this announcement from Scrapbook Adhesives by 3L. Log on and sign up to find out what's "the shape to come"!

SPECIAL ANNOUNCEMENT.…


Get ready to bring your craft to a whole new level! If you want to know what the big news is BEFORE anyone else… be sure you’ve signed up at theshapetocome.com !


If you register your email address before July 25th, you’ll get a special pre-show announcement one day before the CHA Trade Show opens!! One lucky person that signs up between now and July 25th will be chosen at random to win $50 (msrp) of SCRAPBOOK ADHESIVES BY 3L™ products (winner announced on their blog August 2nd)!


I LOVE their EZ Runner and foam squares.  Good luck!!

Rose Tutorial and Blog Candy Winner!


This really is my Wednesday evening post - I started at 10pm but had to edit all of my photos.  I'm sooooo slow!!!

Well, several people have asked about the rose on my sister's birthday card.  Well, I found the tutorial that I followed here.  It's an awesome tutorial and easy to follow.

Here's how I made mine - I just changed up the way that I cut the rose bases.  I used Spellbinders(TM) Nestabilities(R) Dahlia and Standard Circles LG (see how I scribbled it on my deskpad so I'd remember?  tee hee).


Cut three 4" squares of designer paper.  Mine is double-sided, just slightly darker on one side.   Place your die templates on your mat as shown - you'll see why you need the circle in a minute.


Now, there's no need to emboss the paper, so I went ahead and cut all three papers at once to save time.


Save one of the 'leftover' circles - we'll use it later as our rose base.  Cut the three 'flowers' as follows (my picture's not exactly right, so 'do as I say, not as I do' - ha!

1.  Cut one piece so that you have a section with six petals and a section with two petals.
2.  Cut the second piece so that you have five petals and a section with three petals.
3.  Cut the last piece so that you have a piece with four petals, one petal, and a throw-away piece with three petals.


Sponge the outer (petal) edges with a coordinating ink.


Using a toothpick, skewer, or piercing tool (I call mine my 'poker' - I'm just sayin'......), curve all of the petal edges under.


Here's how it looks on one side - you can see the other side of the petal directly underneath my hand.  Now, using the largest section, wrap it around so that the first petal 'covers' the last petal; glue with a strong adhesive.  See the piece just below, next to my watermark, for an actual photo.  Now, if we had not cut that circle piece out, the flower would have been super tall, right?  It will still be three dimensional, but not insanely so - ha!


Now, the sections with two and one petal are going to be at the very center of the flower, so instead you will roll them up vertically (photo above) after you've rolled the edge under. 


Stack the layers together as shown above.  Pretty, right?  Smear that circle (that you saved from step one) with adhesive.  I used Aleene's Fast Grab Tacky Glue in the purple bottle.  It really is goopy and holds your project together rather quickly so you don't have to sit there and hold it forever. 


Place your layers on the circle, press to adhere, and voila!!!!  A lovely, glorious rose!!

Go ahead and try some for yourself.  You can see the size that a 4" square will make.  Try smaller ones, make some leaves and you're set!  Link yours here so we can all admire them!

Now, for the blog candy!  I promised blog candy on Monday's post.  And I finally took a photo!  Here's what's included:

  • A full-sized acrylic stamp set, "Holiday Warmth"
  • A tiny stamp set in its own cute little package!
  • The most awesome bone folder you'll ever use
  • Rhinestone frames
  • White flowers
  • Shimmery adhesive-backed pearls
  • A large roll of black/white floral grosgrain ribbon
  • One of my favorite cards :-)

And the winner is.......................

JessicaK!!!!  Thanks to everyone who left a comment.  You're awesome!

Jessica....e-mail me so I can get your goodies in the mail!

I'll be back this weekend with a 'twist' on my Spellbinders Blog Frenzy project.

Thanks again,


Monday, July 19, 2010

Embossed Ornament Tutorial and some blog candy!

Happy Monday!  First and foremost, I want to thank you so much for all of your sweet comments this weekend.  I truly hope that you try and make your own flower.  Of course, I had a 'brainstorm' (as my mom would say - tee hee) last night as to how to change it up a little bit.  I'll work on that this week and try to have a new tutorial for you next weekend.

In the meantime, here are the directions for making the ornament:


This simple but elegant holiday ornament was made with S4-288 Classic Diamonds Die Templates and I2-1009 Flourish Impressabilities.  Here are some of the products that you will need to create this project:


Use your favorite cardstock color - just think of the possibilities!  I used CTMH Blush cardstock for the base and WorldWin Papers' Mirror-Cast Gold Metallic Foil for the smaller diamonds.


Cut/emboss eight cardstock diamonds with S4-288 Classic Diamonds #5 (remember, the smallest die template is #1, increasing in number as they get larger).  Cut/emboss eight foil cardstock diamonds with die template #4, embossing with the I2-1009 Impressabilities.  The above picture shows how to make your sandwich:  Place your white master plate on the bottom, followed by the Impressabilities,  followed by the Classic Diamonds die template (cutting side up), followed by the foil cardstock (face down), followed by the embossing mat, followed by the second white master plate.  Doesn't that embossed diamond look gorgeous?


Center the foil/embossed diamond over the blush cardstock diamond, adhering with your favorite adhesive.  Repeat with all eight diamonds.  Score down the center as shown above, fold and crease well with your bone folder.


Use a strong glue to adhere the back of the diamonds together.. 


I used these cute little spiral clips to help hold the seams tightly together while the glue dried.


Before you glue the last set of diamonds together to complete the ornament, insert a long strand of ribbon with which to hang the ornament.

It's easy enough to duplicate, even mass-produce.  Try using different Impressabilities for different looks!  Add pearls at the top and bottom, ribbon, tinsel...you get the idea! 

Here's one I made with red cardstock.  I cut/embossed the smaller diamonds with white cardstock, using the same Flourishes Impressabilities.  With the Impressabilities still in place, I sponged red ink through the openings in the template.


Now.  I promised blog candy!  See that awesome bone folder in the first photo?  It's up for grabs, along with a surprise goody bag of acrylic stamps, ribbon and other high-quality embellishments!  Why is it a surprise?  Because I haven't taken a  photo - tee hee!

So this candy is available to anyone who follows my blog!  Just leave me a comment saying that you are a follower (sign up now - over on the right colunmn) or have been a follower for a while....and you're in the drawing!!!

I'll announce the winner here Wednesday night.  Sound good?

Thanks again for giving me your time.  You guys rock!!!


Friday, July 16, 2010

Spellbinders(TM) Big Event!! Blog Frenzy July 13-20, 2010

My contest is now closed.  Be sure to enter today's contest if it's still open!


Welcome to the fifth day of the Spellbinders(TM) Paper Arts BIG Event!

The BIG Event is Spellbinders Paper Arts’ way of introducing some really exciting new products! This season’s BIG Event is from July 13-20, incorporating 16 fabulous Designers, and you could win BIG!

• Win today’s new die templates!
• Be eligible to win the Grand Prize by entering each day from each blog!
• You may enter once from each blog on the designated days!
• Each contest is open for 48 hours to enter the contest!
• You have until 11:59 p.m. Eastern Standard Time July 18, 2010 to enter my contest. Be sure to read the Official Rules before entering so that your entry will be valid!

These are the Designers and their contest dates:

July 13
Julie Overby
Debbie Olson

July 14
Judy Hayes
Latisha Yoast

July 15
A. J. Otto
Kimberly Crawford

July 16
Becca Feeken
Linda Duke

July 17 
Sherry Cheever
Deb Young -that would be me!!!

July 18 
Gina Hanson
Ashley Cannon Newell

July 19 
Mona Pendleton
•  Heidi Blankenship

July 20 
Kerilee Sereika
• Kazan Clark


Daily contest winners are randomly chosen from valid entries, as stated in the Official Rules. The winners will receive an email within 24 hours of the contest’s closing. The winners will have 72 hours to reply to that email to claim prize. If a winner fails to respond within 72 hours, a new winner will be drawn.

Entrants that send valid contest entry emails to each of the contests will be automatically considered for the Grand Prize. The Grand Prize has a retail value of over $700, and includes Spellbinders CHA Summer 2010 release die templates, Spellbinders CHA Summer 2010 release punch templates and a Presto Punch™ machine!

Thank you, Spellbinders Paper Arts, for sponsoring this contest!

I’m thrilled to share S4-288 Classic Diamonds Nestabilities(R) with you!


Yes, those are S4-288 Classic Diamonds Nestabilities cut and folded into petals on the lid!  Here's how I used S4-288 Classic Diamonds Nestabilities to make the flower:

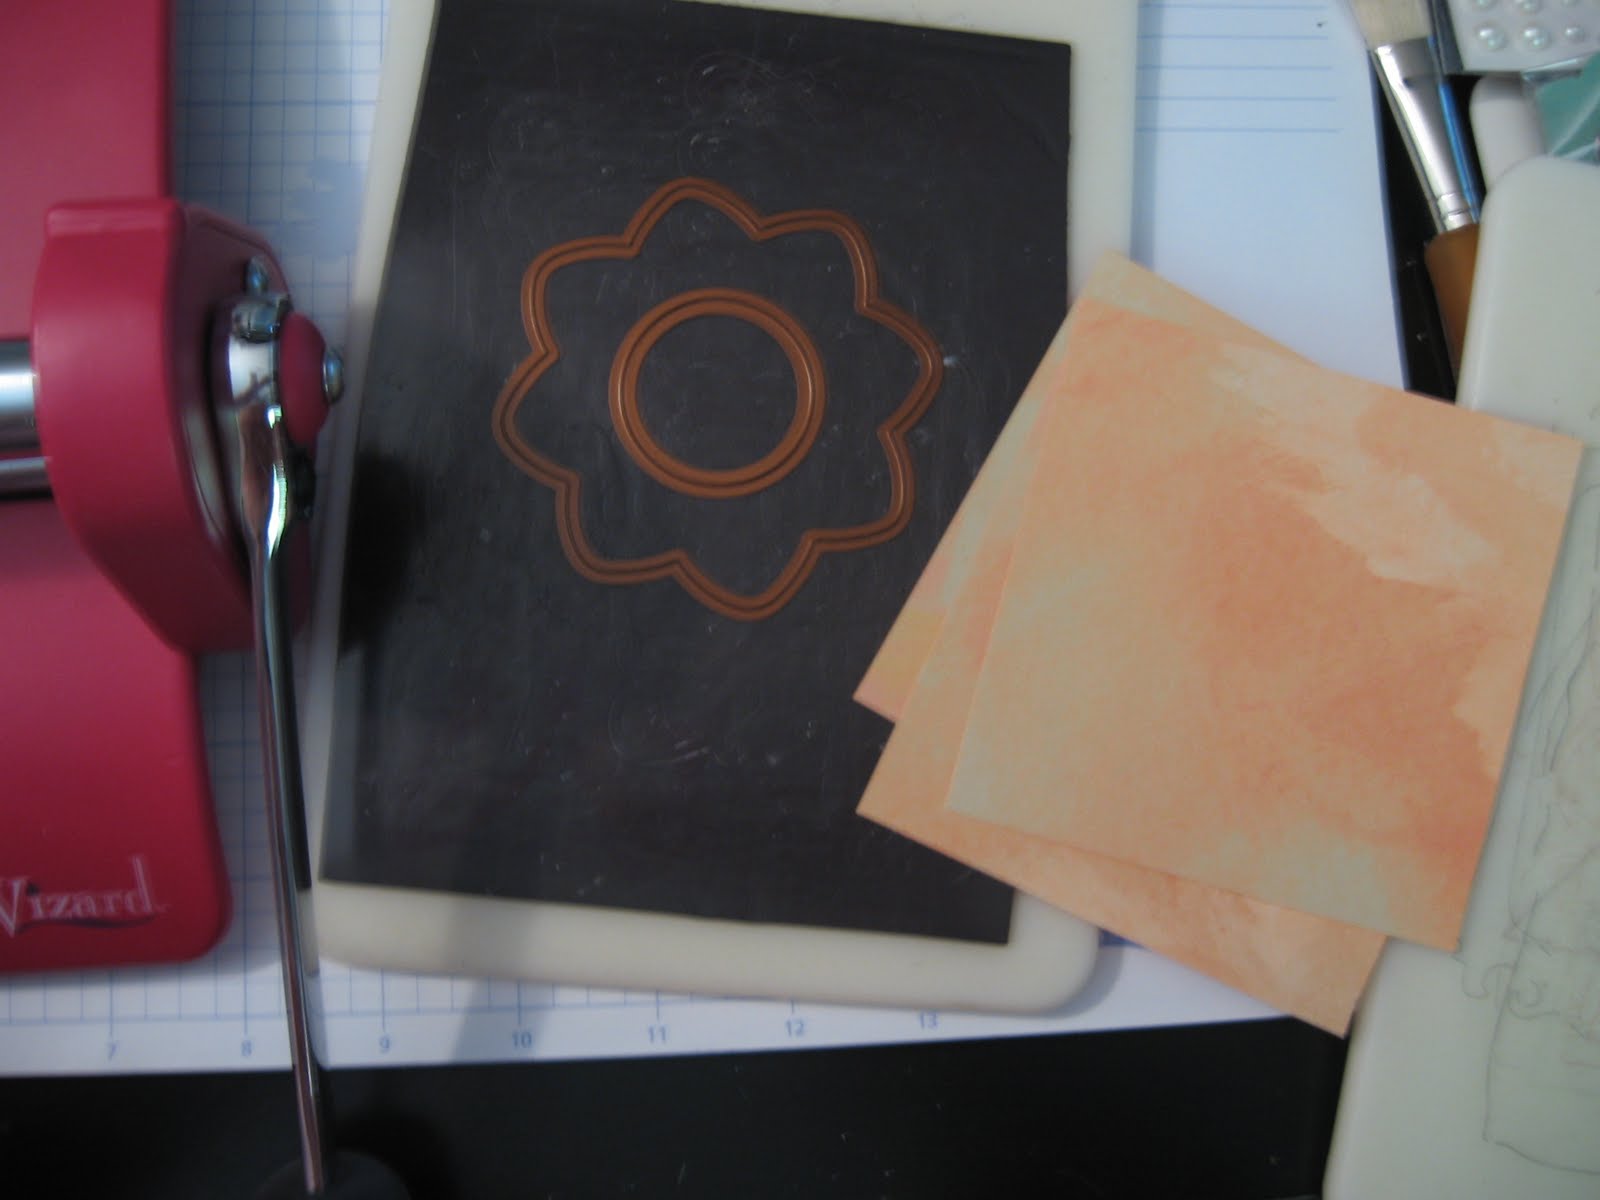
Cut ten diamond frames from double-sided paper by nesting S4-288 Classic Diamond #4 and #5 (with #1 being the smallest size in the set) to make the frame.


Score each diamond frame about 1/4 inch from the center.  I've indicated my score lines with arrows.


Fold on the score lines as shown below.  Now you can see why I decided to use double-sided paper :-).


Pull the two short ends together so that the long sides form a double loop - this is where a picture is worth a thousand words!
 

Pinch those short sides together and adhere the 'pinched' end with adhesive.


Here's how my ten petals looked before I adhered them to each other. 


Now here's where I had to really get creative!  First I tried adhering the bases (those short sides) directly together, but I discovered that the petals were too full; I needed something to 'shim' those pinched bases.  After a few trials and errors and a couple of Aleve (tee hee), I spied a makeup sponge on my desk.  I snipped nine small pieces of sponge and glued one between each petal's pinched end.  This photo shows how it looked before I glued the final one sponge/petal.  And it worked!


Using S4-249 Big Scalloped Circles LG Nestabilities #7, cut a large scalloped circle to cover the top of the lid.  Adhere your pretty petal next.  Make a scalloped circle sandwich using S4-269 Big Scalloped Circles LG #2 and #3.  Stamp the element with a pretty image and use it to cover the open center of the petal.


Use coordinating paper to cover your box.  Cut/emboss a label with S4-288 Classic Diamonds Nestabilities #3 and #4, stamp with a sentiment, and adhere.  I used a Copic marker to color the pearls to match the paper.

You could use more than ten petals or less, depending upon the size of the die template.  Try it and let me know how yours turns out!


Supplies:

  • Spellbinders products:  S4-288 Classic Diamonds Nestabilities, S4-249 Big Scalloped Circles LG Nestabilities, Wizard Die Cutting Machine
  • Paper:  Kaisercraft Rosa, Nadia and Sofia; CTMH Blush Cardstock
  • Stamps: Waltzingmouse 'Seasons of Love Tags'
  • Inks:  Copic R37 Marker (Carmine); CTMH Vineyard Berry and Blush Ink
  • Other:  Beacon Zip Dry Glue; Scrapbook Adhesives EZ Runner; CTMH Bonding Memories Glue; White Pearls; Papier Mache Box
Here's another project I made using the S4-288 Classic Diamonds Nestabilities die templates:


Visit my blog again Monday and I'll show you step-by-step directions to make this beauty......and I'm giving away some blog candy along with it!
 
This is the Spellbinders product I introduced:


SKU/Product Name:  S4-288 Classic Diamonds
MSRP: $24.99
Dimensions:
1: 1x1 3/8”
2: 1 1/2 x 1 7/8”
3: 2 x 2 3/8”
4: 2 1/2 x 3”
5: 3 x 3 5/8”
6: 3 1/2 x 4 ¼”
7: 4 x 4 7/8”

For the official Spellbinders Paper Arts BIG Event rules, click here.

TO ENTER MY CONTEST: (Contest is open for entries from July 17 to July 18)

1) Send your email entry to  Reveal10@Spellbinders.us (either click the link or type the address into your email program).

2) The subject must be Classic Diamonds.

3) Send!

I love your comments! Unfortunately your comment does not count towards a contest entry, so be sure to enter and then leave a comment!

If you have any questions, please e-mail ContestQuestions@Spellbinders.us.

Thank you for visiting my blog and good luck!!

Wednesday, July 14, 2010

Forever Friends Scrapbooking in Melbourne, Florida


Oh, how nice to have a couple of days at home to create.  So I pulled out this 6x6 paper pad from Webster's Pages that I've been dreaming about for a couple of months now. 

Each page is adorned with precious birdies, trees, flowers or other natural elements....in these wonderfully muted colors.  I'm in paper heaven!

Add a few Nestabilities(R) die templates, coordinating ribbon and fun embellishments and call it a card!

Recipe:

Paper:  Webster's Pages, DCWV, CTMH
Ribbon:  Webster's Pages
Ink:  CTMH
Dies: S4189 Labels Three, S4-190 Labels Four
Stamps and embellishments:  CTMH (new releases available September 1)

Make sure you stop in Friday as it's my Spellbinders(TM) Design Team BIG Frenzy release day!  In the meantime, check out the other designers....and make sure you enter to win one, a few, or all of the new releases!

Well, it seems that my free background service is in the midst of changing servers, so my purrty green and gold background is in blog purgatory.  I hope it's fixed in time for my Frenzy post!

Hey!  Thanks for stopping by.  I always appreciate hearing from you.

Take care,

Tuesday, July 13, 2010

Want to win? Today's the Spellbinders(TM) Big Event! Scrabooking in Melbourne, Florida

Whew!  It's finally here! 

Check out the Spellbinders' blog for the full schedule for the BIG Event Blog Frenzy!  Two ladies will reveal the new summer release die templates to you today...then check back each day for more fun!  Be sure to enter to win some, or ALL of the goodies!!!  My reveal is on the 17th...but don't wait....start by checking out Julie's blog today! 

Here's the whole schedule:

July 13

• Julie Overby

• Debbie Olson


July 14

• Judy Hayes

• Latisha Yoast


July 15

• A. J. Otto

• Kimberly Crawford


July 16

• Becca Feeken

• Linda Duke


July 17

• Sherry Cheever

• Deb Young


July 18

• Gina Hanson

• Ashley Cannon Newell


July 19

• Mona Pendleton

• Heidi Blankenship


July 20

• Kerilee Sereika

• Kazan Clark

Friday, July 9, 2010

Where in the world is Deb Young? CTMH Scrapbooking in Melbourne, FL


Hey y'all!  It's the third day of the Close To My Heart convention here in HOT Washington, DC!  I have a new bag (woohooo!!!), new INKS, new papers, stamps and a new friend!  Doesn't Pat look cute as a Flamingo Girl?  I'm just sayin'......


Here's the rest of the silly flock.  Deb Tuggle made our shirts - woohoo!!  I know the thousand other people must think we are nuts, but we are the only ones that have an easy time finding each other in the crowd!


The Gaylord National Harbor is awesome.  As usual, CTMH went out of their way with this convention.  Look at this - part of the staff did a great rendition of Beyonce's Single Ladies video - complete with bling!  And Jeanette donned "The Donald's" hairpiece and took care of some business.

A few lucky ladies even got their own CTMH-engraved Snuggy!  Good grief!  Maybe they weren't so lucky - tee hee!

Well, I'm almost late for create-n-take class.....thanks for stopping by!