


Showing posts with label Blog Candy. Show all posts

Thursday, July 22, 2010

Rose Tutorial and Blog Candy Winner!


This really is my Wednesday evening post - I started at 10pm but had to edit all of my photos.  I'm sooooo slow!!!

Well, several people have asked about the rose on my sister's birthday card.  Well, I found the tutorial that I followed here.  It's an awesome tutorial and easy to follow.

Here's how I made mine - I just changed up the way that I cut the rose bases.  I used Spellbinders(TM) Nestabilities(R) Dahlia and Standard Circles LG (see how I scribbled it on my deskpad so I'd remember?  tee hee).


Cut three 4" squares of designer paper.  Mine is double-sided, just slightly darker on one side.   Place your die templates on your mat as shown - you'll see why you need the circle in a minute.
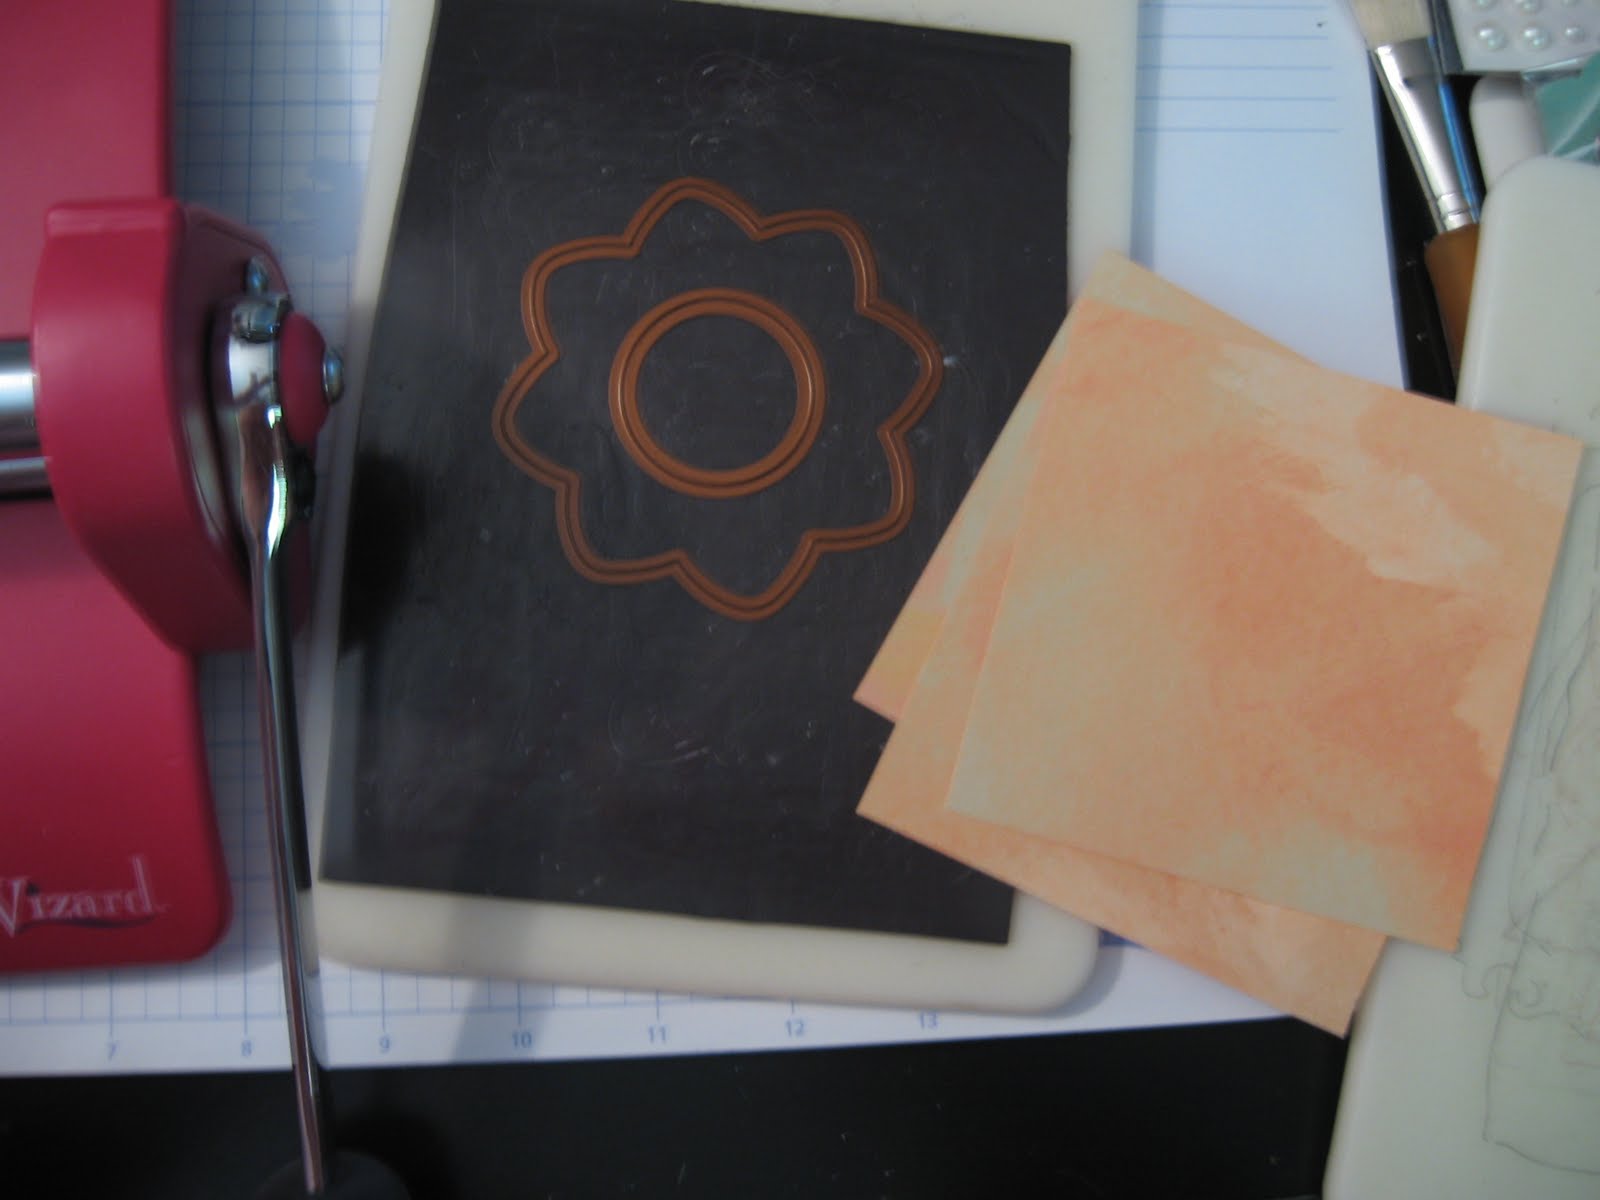

Now, there's no need to emboss the paper, so I went ahead and cut all three papers at once to save time.


Save one of the 'leftover' circles - we'll use it later as our rose base.  Cut the three 'flowers' as follows (my picture's not exactly right, so 'do as I say, not as I do' - ha!

1.  Cut one piece so that you have a section with six petals and a section with two petals.
2.  Cut the second piece so that you have five petals and a section with three petals.
3.  Cut the last piece so that you have a piece with four petals, one petal, and a throw-away piece with three petals.


Sponge the outer (petal) edges with a coordinating ink.


Using a toothpick, skewer, or piercing tool (I call mine my 'poker' - I'm just sayin'......), curve all of the petal edges under.


Here's how it looks on one side - you can see the other side of the petal directly underneath my hand.  Now, using the largest section, wrap it around so that the first petal 'covers' the last petal; glue with a strong adhesive.  See the piece just below, next to my watermark, for an actual photo.  Now, if we had not cut that circle piece out, the flower would have been super tall, right?  It will still be three dimensional, but not insanely so - ha!


Now, the sections with two and one petal are going to be at the very center of the flower, so instead you will roll them up vertically (photo above) after you've rolled the edge under. 


Stack the layers together as shown above.  Pretty, right?  Smear that circle (that you saved from step one) with adhesive.  I used Aleene's Fast Grab Tacky Glue in the purple bottle.  It really is goopy and holds your project together rather quickly so you don't have to sit there and hold it forever. 


Place your layers on the circle, press to adhere, and voila!!!!  A lovely, glorious rose!!

Go ahead and try some for yourself.  You can see the size that a 4" square will make.  Try smaller ones, make some leaves and you're set!  Link yours here so we can all admire them!

Now, for the blog candy!  I promised blog candy on Monday's post.  And I finally took a photo!  Here's what's included:

  • A full-sized acrylic stamp set, "Holiday Warmth"
  • A tiny stamp set in its own cute little package!
  • The most awesome bone folder you'll ever use
  • Rhinestone frames
  • White flowers
  • Shimmery adhesive-backed pearls
  • A large roll of black/white floral grosgrain ribbon
  • One of my favorite cards :-)

And the winner is.......................

JessicaK!!!!  Thanks to everyone who left a comment.  You're awesome!

Jessica....e-mail me so I can get your goodies in the mail!

I'll be back this weekend with a 'twist' on my Spellbinders Blog Frenzy project.

Thanks again,


Monday, July 19, 2010

Embossed Ornament Tutorial and some blog candy!

Happy Monday!  First and foremost, I want to thank you so much for all of your sweet comments this weekend.  I truly hope that you try and make your own flower.  Of course, I had a 'brainstorm' (as my mom would say - tee hee) last night as to how to change it up a little bit.  I'll work on that this week and try to have a new tutorial for you next weekend.

In the meantime, here are the directions for making the ornament:


This simple but elegant holiday ornament was made with S4-288 Classic Diamonds Die Templates and I2-1009 Flourish Impressabilities.  Here are some of the products that you will need to create this project:


Use your favorite cardstock color - just think of the possibilities!  I used CTMH Blush cardstock for the base and WorldWin Papers' Mirror-Cast Gold Metallic Foil for the smaller diamonds.


Cut/emboss eight cardstock diamonds with S4-288 Classic Diamonds #5 (remember, the smallest die template is #1, increasing in number as they get larger).  Cut/emboss eight foil cardstock diamonds with die template #4, embossing with the I2-1009 Impressabilities.  The above picture shows how to make your sandwich:  Place your white master plate on the bottom, followed by the Impressabilities,  followed by the Classic Diamonds die template (cutting side up), followed by the foil cardstock (face down), followed by the embossing mat, followed by the second white master plate.  Doesn't that embossed diamond look gorgeous?


Center the foil/embossed diamond over the blush cardstock diamond, adhering with your favorite adhesive.  Repeat with all eight diamonds.  Score down the center as shown above, fold and crease well with your bone folder.


Use a strong glue to adhere the back of the diamonds together.. 


I used these cute little spiral clips to help hold the seams tightly together while the glue dried.


Before you glue the last set of diamonds together to complete the ornament, insert a long strand of ribbon with which to hang the ornament.

It's easy enough to duplicate, even mass-produce.  Try using different Impressabilities for different looks!  Add pearls at the top and bottom, ribbon, tinsel...you get the idea! 

Here's one I made with red cardstock.  I cut/embossed the smaller diamonds with white cardstock, using the same Flourishes Impressabilities.  With the Impressabilities still in place, I sponged red ink through the openings in the template.


Now.  I promised blog candy!  See that awesome bone folder in the first photo?  It's up for grabs, along with a surprise goody bag of acrylic stamps, ribbon and other high-quality embellishments!  Why is it a surprise?  Because I haven't taken a  photo - tee hee!

So this candy is available to anyone who follows my blog!  Just leave me a comment saying that you are a follower (sign up now - over on the right colunmn) or have been a follower for a while....and you're in the drawing!!!

I'll announce the winner here Wednesday night.  Sound good?

Thanks again for giving me your time.  You guys rock!!!


Tuesday, January 12, 2010

Monochromatic Challenge - Think Ink Tuesday! Scrapbooking in Melbourne, Florida


It's time for a challenge from Artful Inkables!  This week's challenge is to create a monochromatic card.  How cool is that!

I don't know about you, but I am finding that participating in challenges is  really making me break through my comfort zone to try things that would not have otherwise entered my thick skull - tee hee!


For my card, I used Colonial White as my color, punched up with Cocoa.  It won't surprise you to hear that I used "A Bird's Song" to stamp the nest and sentiment!


I've been dying to use my Labels Seven Nestabilities dies -it really looks like a little book!  I sandwiched some 'pages' die-cut from an old book and bound them al together with a bit of waxy flax.  The cute little flourishes are cut from Spellbinders' Doodle Parts, and flower is made with six circles cut using Scalloped Circles Nesties.

The Cocoa paper is the backside of a couple of papers from CTMH's Veranda collection.  The rest of the paper is Colonial White cardstock, with the exception of the 'background', which is textured Colonial White cardstock.  I used my stipple brush to 'knock down' the brightness of the paper with Cocoa Ink.  You can click on the image to view it up close. 

So why don't you stretch your creative boundaries and join us in our challenge?

* You are not required to use AI stamps, but if you have them, we'd love to see you use them! **IF YOU USE AI STAMPS, YOU GET 2 ENTRIES FOR YOUR CREATION! JUST ENTER YOUR NAME/LINK TWICE ON MR. LINKY!!!

* You have until Monday, January 18, 2010, midnight Pacific Standard Time to link your creation to this post. A winner will be chosen Tuesday, January 5, 2010 to win a GRAB BAG of AI STAMPS!

* When posting your link, please post the link directly to your creation- so if it's on your blog, please link it directly to the specific post with your creation.

* If uploading to SCS or PCP, please add the keyword AIC11


Good luck!


Deb

Monday, September 14, 2009

BOO!!!! Artful Inkables New Release Blog Hop! Scrapbooking in Melbourne, Florida

Welcome to the Artful Inkables New Relase Blog Hop!


You should be joining me from Jackie’s blog. If you’ve missed any of the blog hop, you might want to start at the Artful Inkables Blog and follow the links. Each member of the design team has a creation with one of two new sets, “Halloween Hauntings” and “Holiday Treats and Tails”.

I broke open the new “Halloween Hauntings” set and started playing. How can you resist those cute little ghosts????!!! And the sentiment – “A big ole BOO from me to you” – good grief! You gotta love it! I used a DCWV paper stack from JoAnn’s for the patterned paper, along with my trust CTMH inks, liquid glass, ribbon, brads and cardstock.

Have you commented on each of the INKgirls’ blogs? Have you seen something that you are going to make for Halloween or Christmas? I sure have! Be sure you left all the INKgirls a comment, because one lucky reader will win both new releases!!! wooHOOO!!!!


I have the honor this month of revealing both sets here. Don’t you just love those cute little beavers?

Leave your comments on the INKgirl blogs no later than Thursday, September 17 Midnight PST. A random winner will be chosen on Friday, September 18, and announced on the Artful Inkables blog!

Good luck!!

Deb


Thursday, May 21, 2009

Blog Candy Links! Scrapbooking in Melbourne, Florida

Are you craving candy today?


Nilla has cool blog candy here.


Steph has more here!

Here is Iris' candy.

Sassy has some great stuff here.

Debbie's birthday candy here.

So much it's making me dizzy! At least this candy is calorie-free!!!

Thursday, May 14, 2009

Blog Candy, Lemonade Stand Award and Baking - Scrapbooking in Melbourne, Florida

Congratulations to the winner of my first blog candy - Melanie S.!

Melanie S. said...
your cards are really cute, thanks for the inspiration.

Thanks, Melanie! I'll be e-mailing you to find out how to get the candy to you. I appreciate the comments that you all left. It's so much fun to share with friends, old and new!

Next - a huge source of inspiration to me is Leslie (aka http://pandascrapper.blogspot.com/). I do not know of anyone who creates more projects than Leslie! She is a rockin' CTMH sistah and a fellow member of the Legacy Leaders. We get to create with our other Legacy Lovelies a couple of times a year (see you in a couple of weeks, dolls!). Well, Leslie has nominated my blog for its first award! May I say WOOOHOOOO?????!!!!!

Look at this cute little Lemonade Stand. As my Aunt Ada Marie from Wise, Virginia would say...."God love!" Actually, the first word would consist of three syllables, the second of two. You haven't lived till you've heard Ada Marie's drawl.

Anyhoo, Leslie seems to think I give her a little inspiration as well, so she passed along this sweet (pun intended...groan) award to me!!! Thanks, sweetie!

Now I have the honor of passing it along to five of my fave bloggers. Do I have to pick just five? Que bummer. Well, here are my first five:

Debbie

Darlene

Misty

Kimberly

Lucy

These lovely ladies are amongst the first to become followers of my young blog! Has it really only been three weeks????? Well, Miss Deb was my initial inspiration to start on this crazy journey. Thanks, Deb!

Here are the rules of the award (To pick up the Lemonade Stand Award):
- Comment on this blog.
- Cut and paste the award logo and use it in your own blog.
- Nominate 5 to 10 blogs you feel show great attitude and gratitude.
- Link to your nominees within your blog post.
- Comment on their blogs to let them know they've received the award
- Link back to the person who gave you the award to show your appreciation.

Well. Now that I have copied Leslie's instructions, I see that I could nominate 5 to 10 bloggers! Now if I take the time to cut, copy, paste five more, the chocolate chip cookies are guaranteed to burn. Yes, I said chocolate chip cookies. For Saturday's Open House and Open Crop....I promised chocolate! I am baking tonight!!! and tomorrow!!!! Yum!

Artwork coming tomorrow....


Sunday, May 10, 2009

Welcome to the CTMH Stamp of the Month Blog Hop!- Scrapbooking in Melbourne, Florida

WOOOHOO!!! It's HERE! The first Stamp of the Month Blog Hop hosted by 18 Close To My Heart Consultants.

Today we are featuring the May Stamp of the Month, "Be Yourself". This set of 14 girly-girl stamps can be yours free with a qualifying purchase, or you can buy it during the month of May from your CTMH consultant. And because this is my very first blog hop, I'm offering free blog candy! Keep reading.....details below!

If you have come here from Ronnie's blog, you are on the right path! If my blog is your first stop, you might want to go back to Jena's blog and start from the beginning! You'll come back to my post after you visit Ronnie's.

This month we have 18 Close To My Heart consultants sharing their creations using "Be Yourself" and other cool CTMH products. This is so esy to do - just click on the link at the end of each blogger's post to move to the next one. Here we go!!!

This little lady is ready to fly away! I used a lot of different products on this card. Wait - we sell Lilac Mist crochet flowers? No, we sell White Daisy crochet flowers - I inked it with a sponge dauber! Cool, right? CTMH products are so adaptable!

Card Recipe:
Stamps: Be Yourself (May SOTM)
Paper: Life Delights Paper Pack
Inks: Hollyhock, Lilac Mist
Accessories: Colonial White RicRac, White Mini-Medleys, Winter Craft Buttons (Blush and Sweet Leaf), Heartfelt(TM) Whimsy Diecuts (the felt button and dragonfly)
Here's a card that we're going to make at my Open House and Open Crop on May 16, using "Be Yourself" and the Emporium Creative Basics Collection. I used the stamp set from the "Tickled Pink" National Scrapbooking Month special to random-stamp the cardstock, creating my own background paper.
And now for the candy! In honor of my first blog hop, I'd like to offer up some White and Sparkly Close To My Heart products! This collection includes 24 stamps in the versatile My Acrylix(R) set "With Love". Also some White Daisy Mini-Medleys (crochet flower, metal ribbon slides, metal flower brads and metal oval tags), mini sparkles, White Daisy organdy ribbon round and White Daisy Bigger Brads.
Simply leave a comment on this post and I'll pick a random number on Wednesday evening (May 13) at 9:00 p.m. EST. Make sure you leave your e-mail address so I'll be able to contact you when you are the winner!
Now "hop" on over to Terri's blog to see her work! Be sure to visit all the consultants' blogs to get some great ideas! Remember the May SOTM is available through May 31! Contact your CTMH consultant or shop my website - get this stamp set at a discount, or even free!!!
Thanks for hopping by - and Happy Mother's Day!!!